Tutorial: Add Stripe credit card payment to Vendure
This article is a short and easy tutorial that will guide you through integrating Stripe payment in your Vendure application, so that customers will be able to purchase your items on your webshop using a credit card or Google Pay. So stay tuned!
Prerequisite
You must have a running Vendure backend and webshop, like the one we deployed on Railway in the last tutorial in less than 10 minutes! If you do not already have a hosted Vendure webshop, please complete the one-click deploy tutorial first:
 Rasmus Puls
Additionally, you will need a Stripe user. Sign up at: Stripe Registration
Step 1: Stripe setup
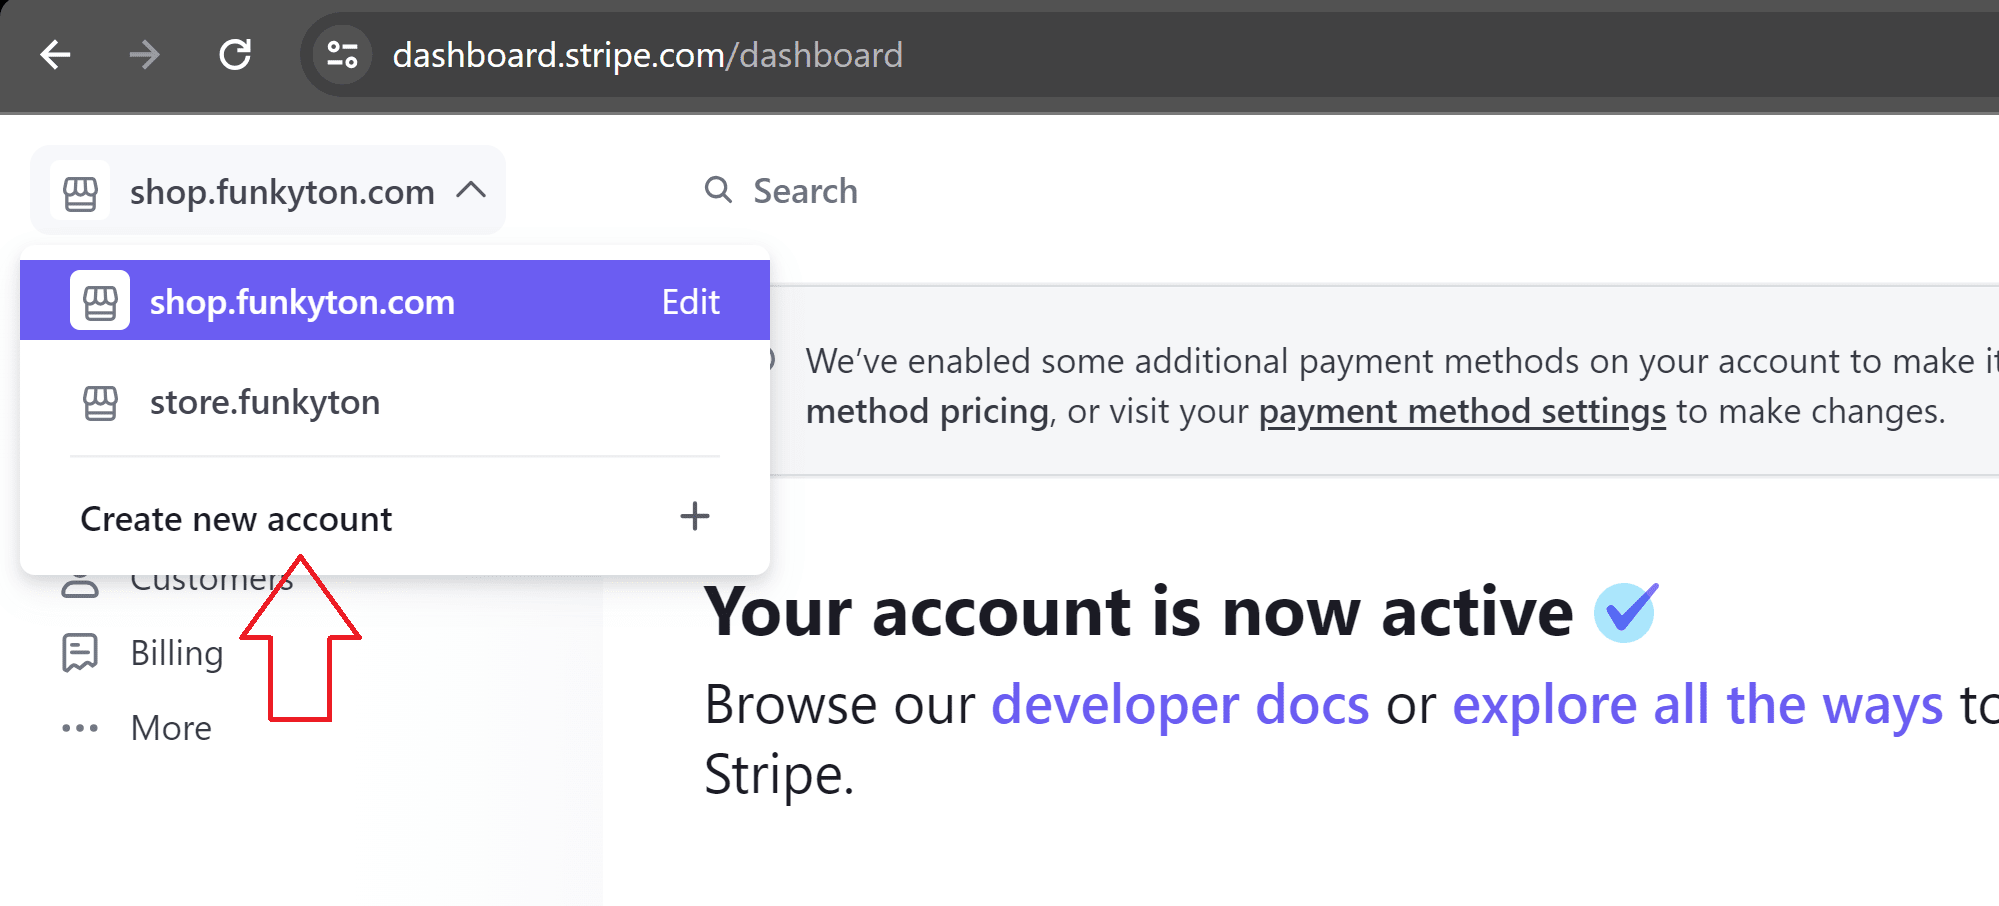
Once you have a Stripe user, you need to add your webshop. In the top left corner, click "Create new account":
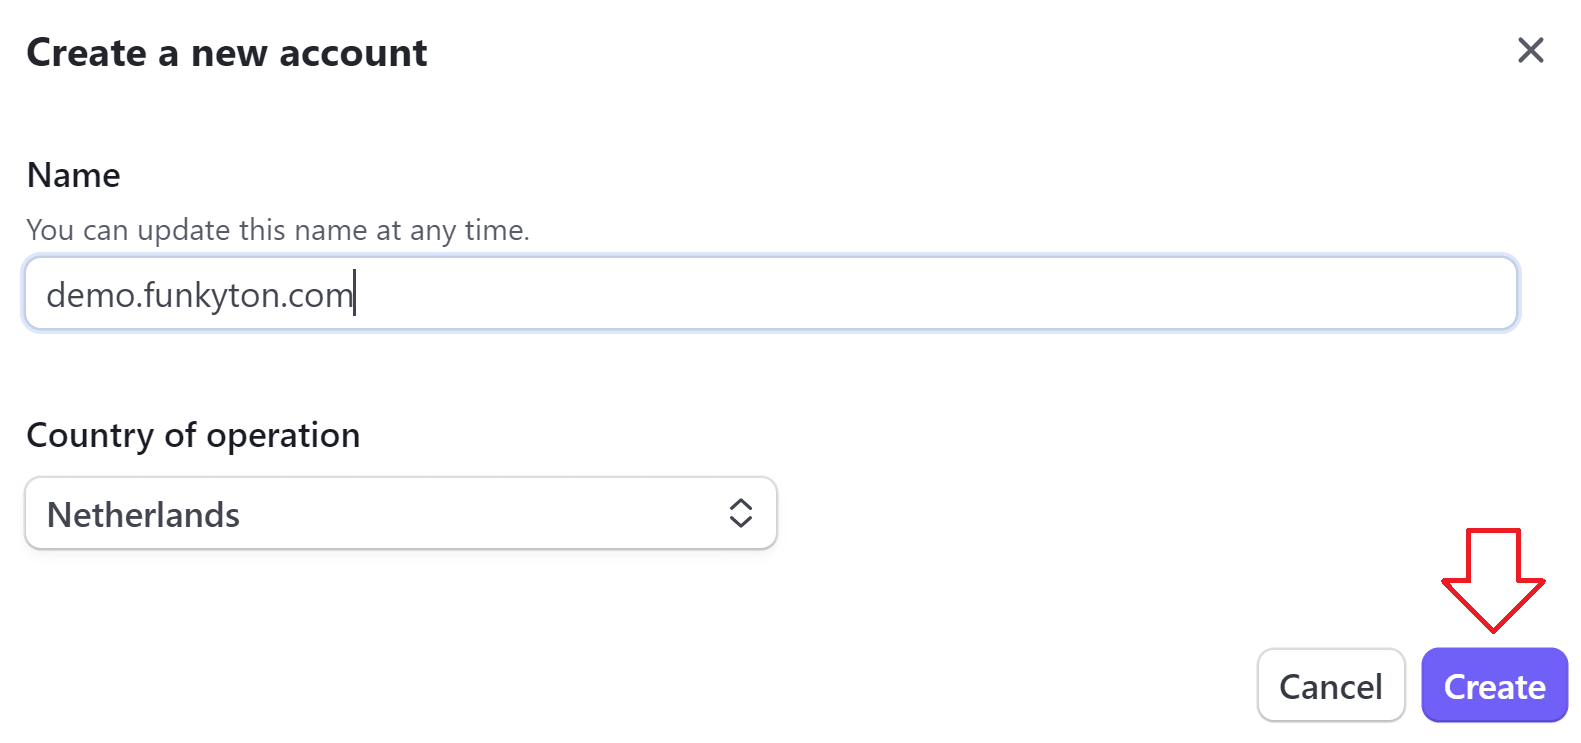
Fill in your details (company or personal), then proceed to "Business details."
It is important that you use your correct Vendure webshop (storefront) public URL in this field. As soon as you paste it in, Stripe performs some checks to see that the website actually exists and runs a little analysis. As for the product description, this field is also important. They might reject your application if you do not provide a sufficient description or if your described product is against their ToS.
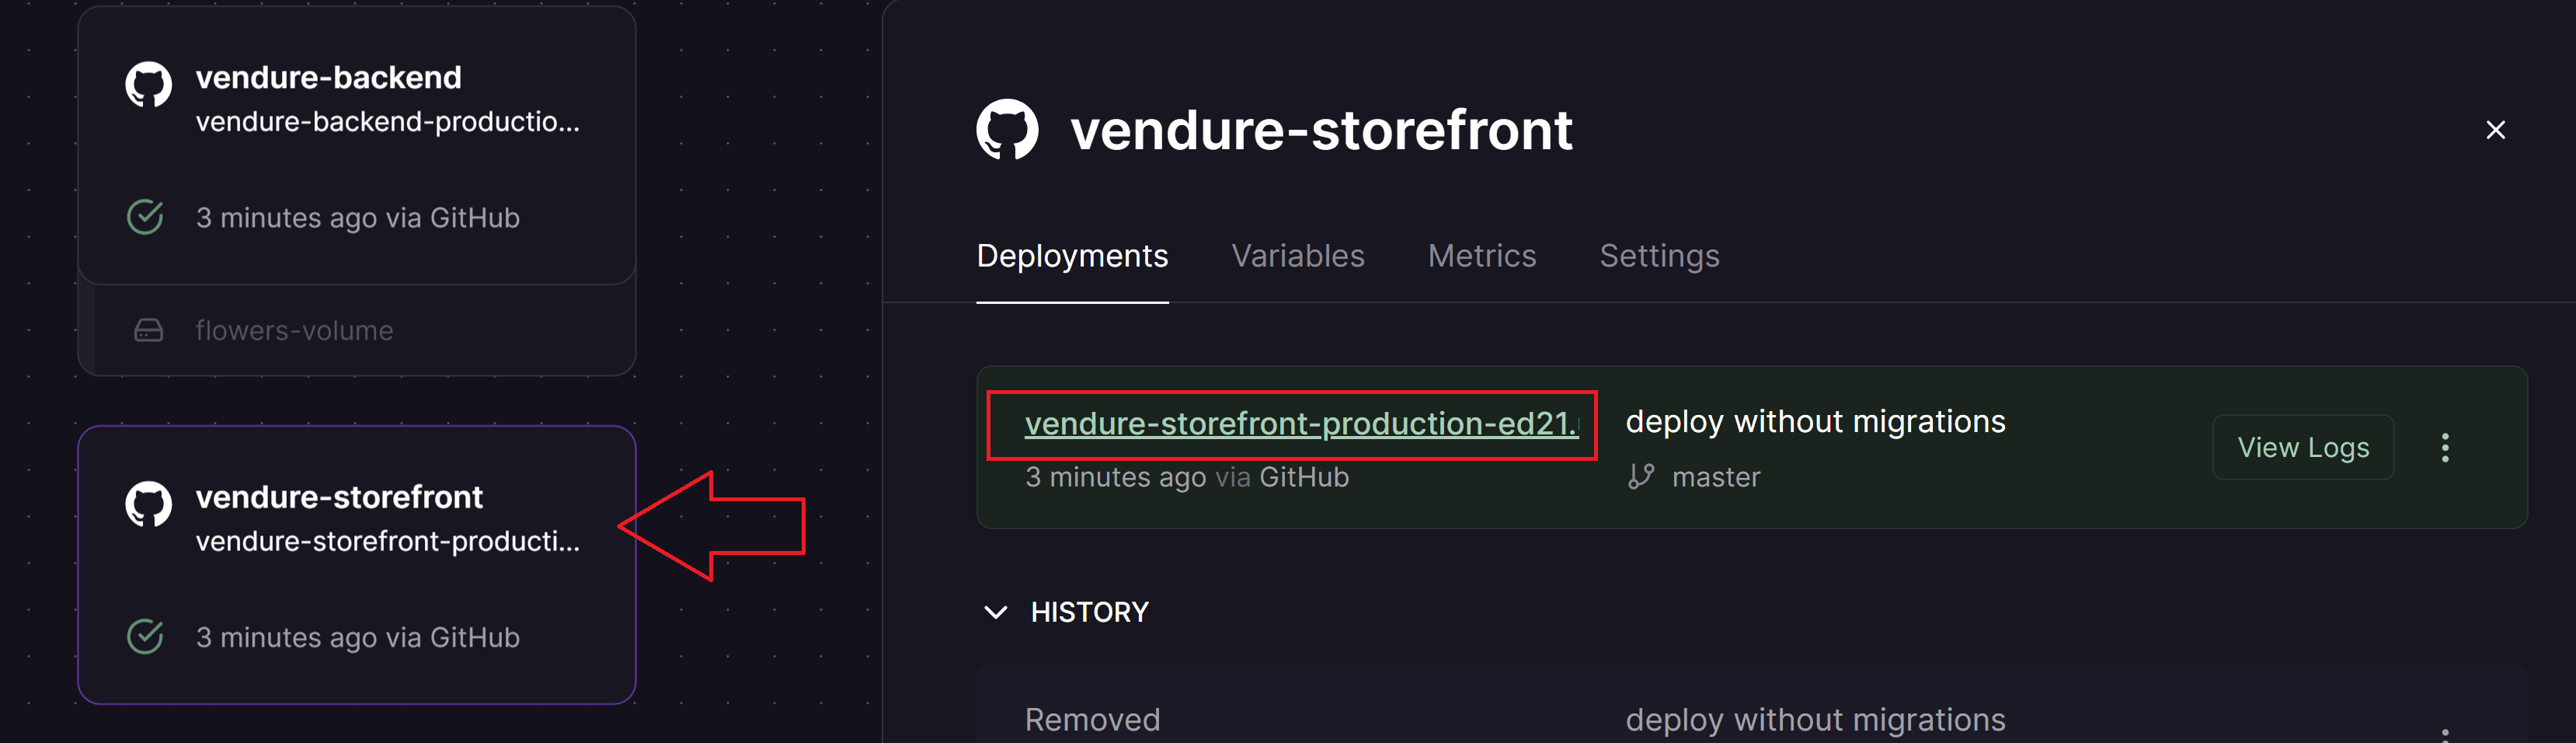
If you have not set up a custom domain on Railway yet but are running on your Railway-provided domain, you can use that. You can find it in your Railway project dashboard by selecting your Storefront service and clicking on the "deployments" tab, then copy the URL in the green deployment box:
Paste the storefront URL in Stripe "business details."
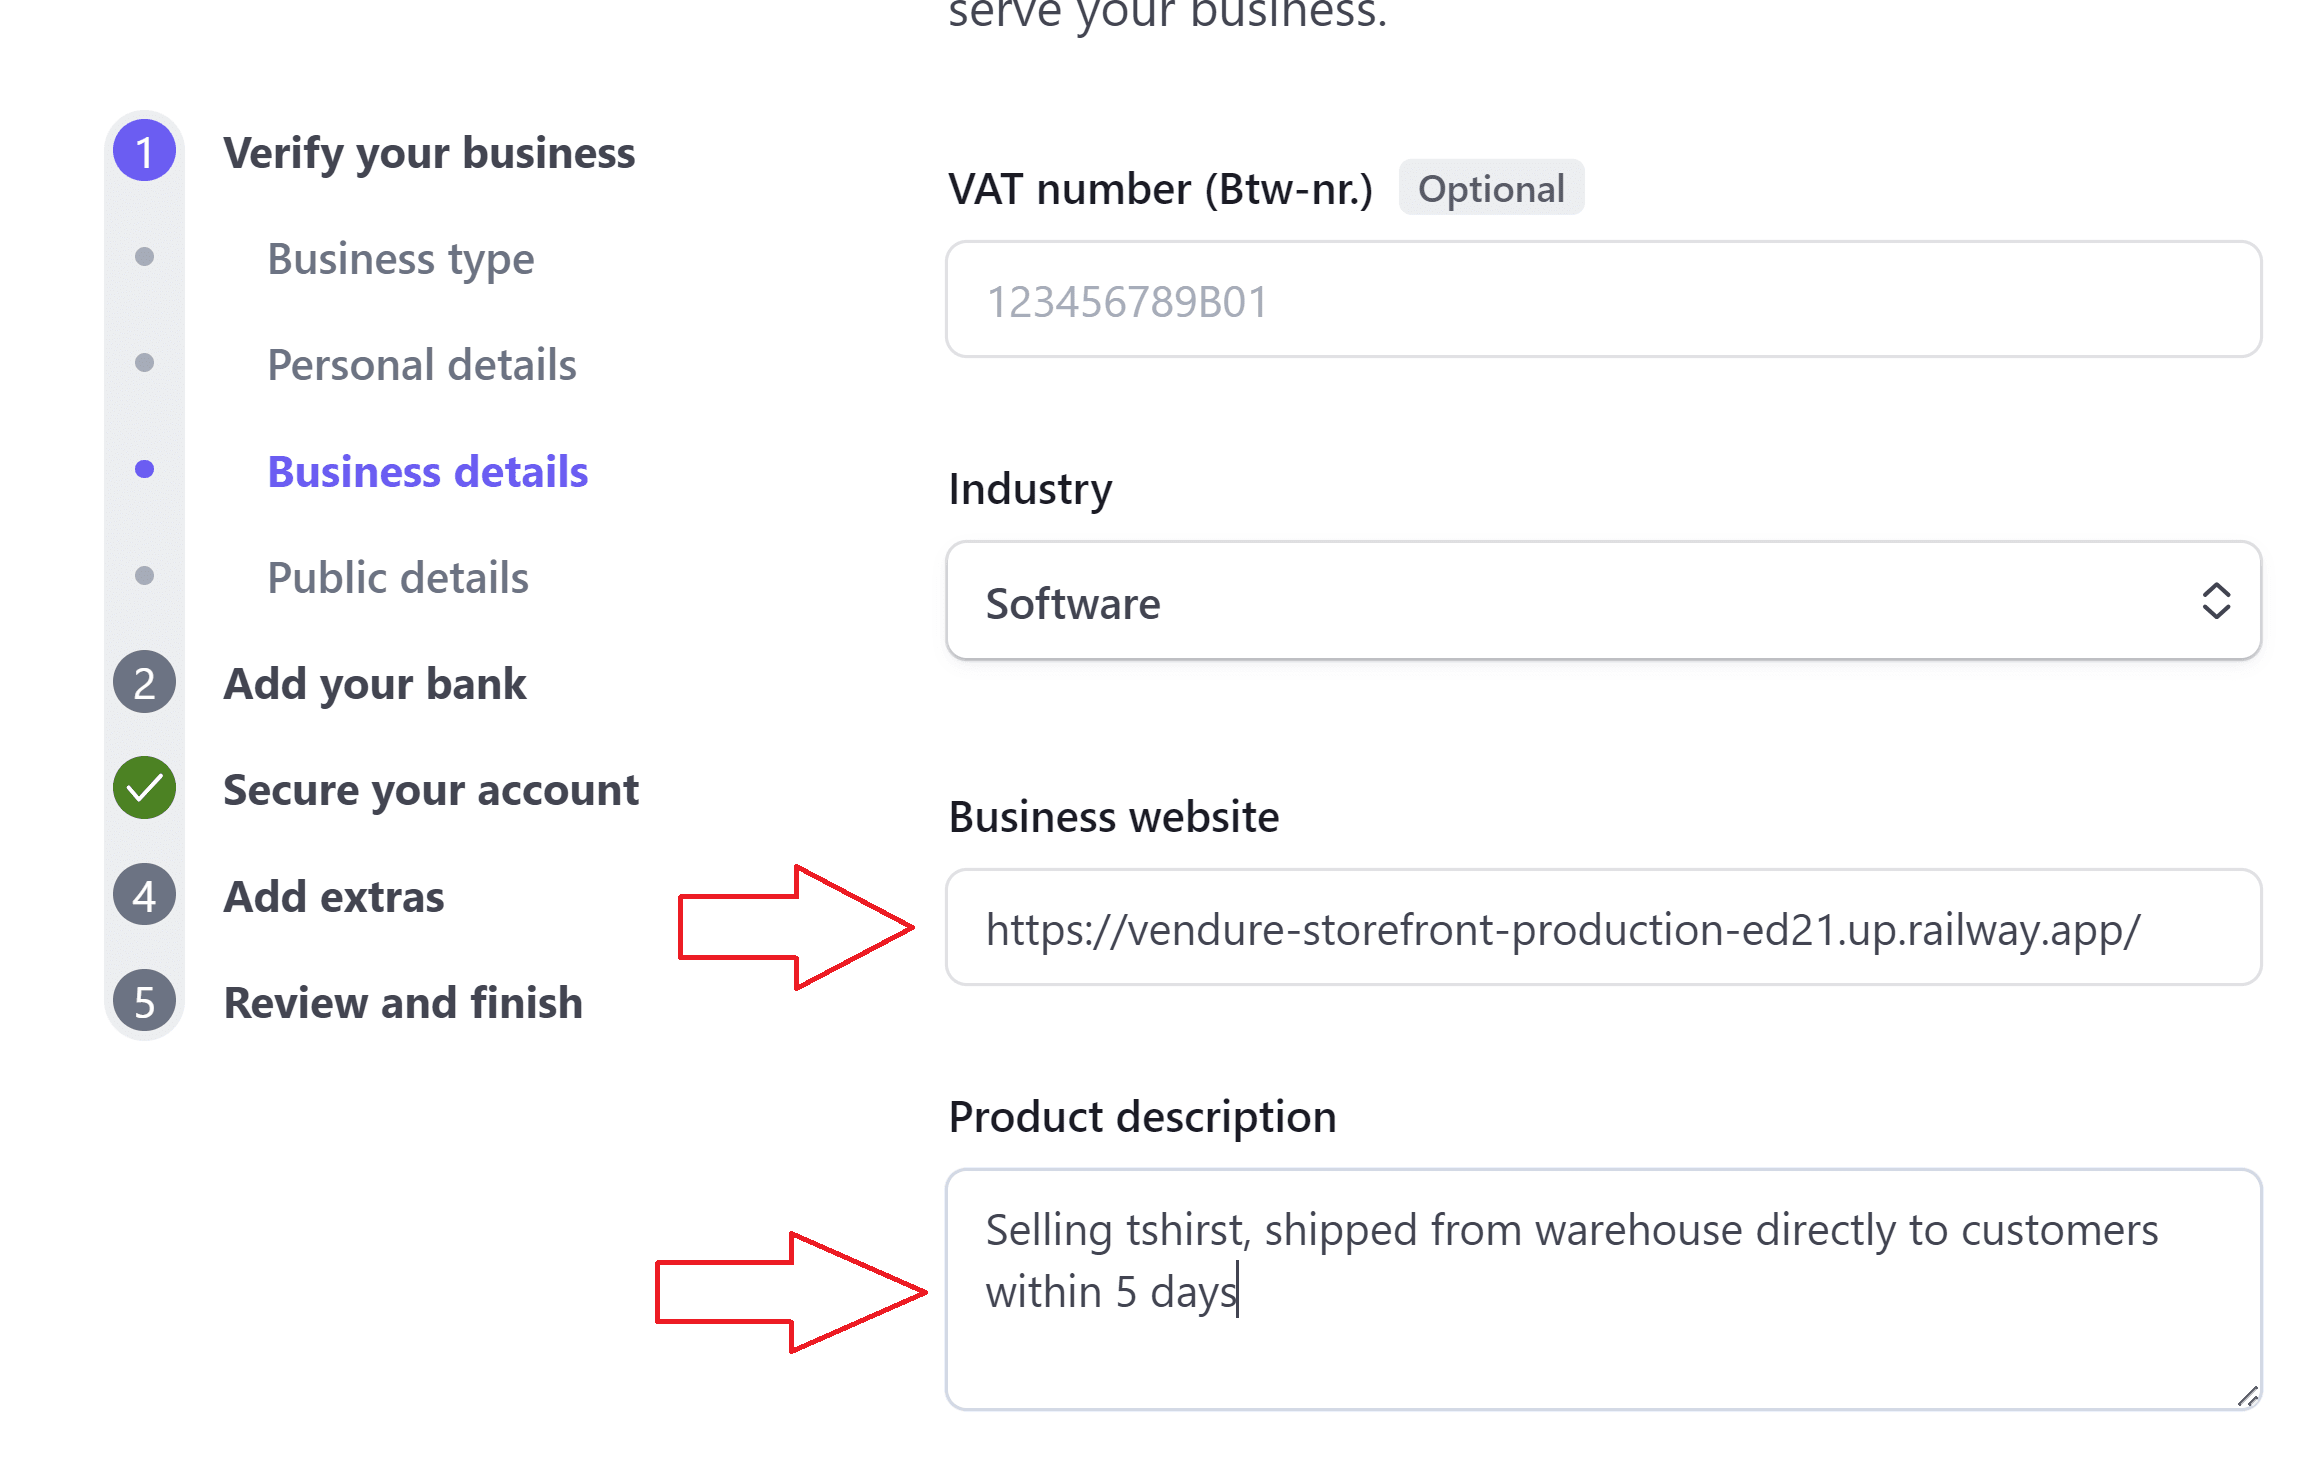
If you have set up a custom domain, use that instead.
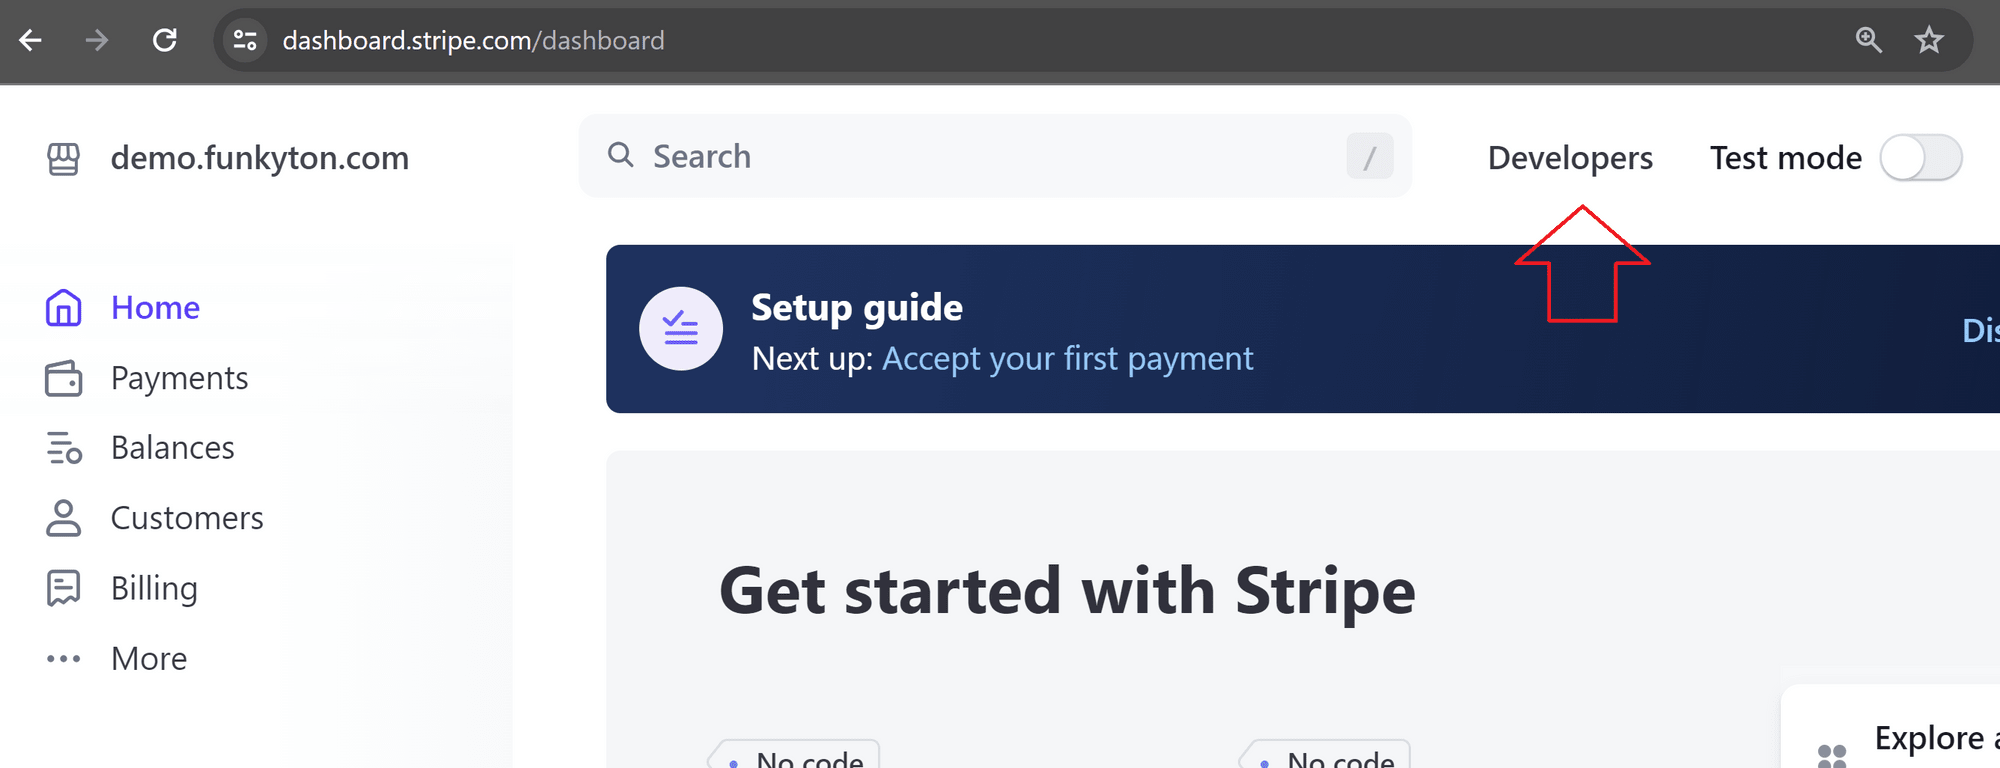
The rest of the setup is straightforward. Just fill in all the required fields and finalize your application. Then you will be taken to your dashboard. From here, we need to find your API keys. Navigate to the "developers" section:
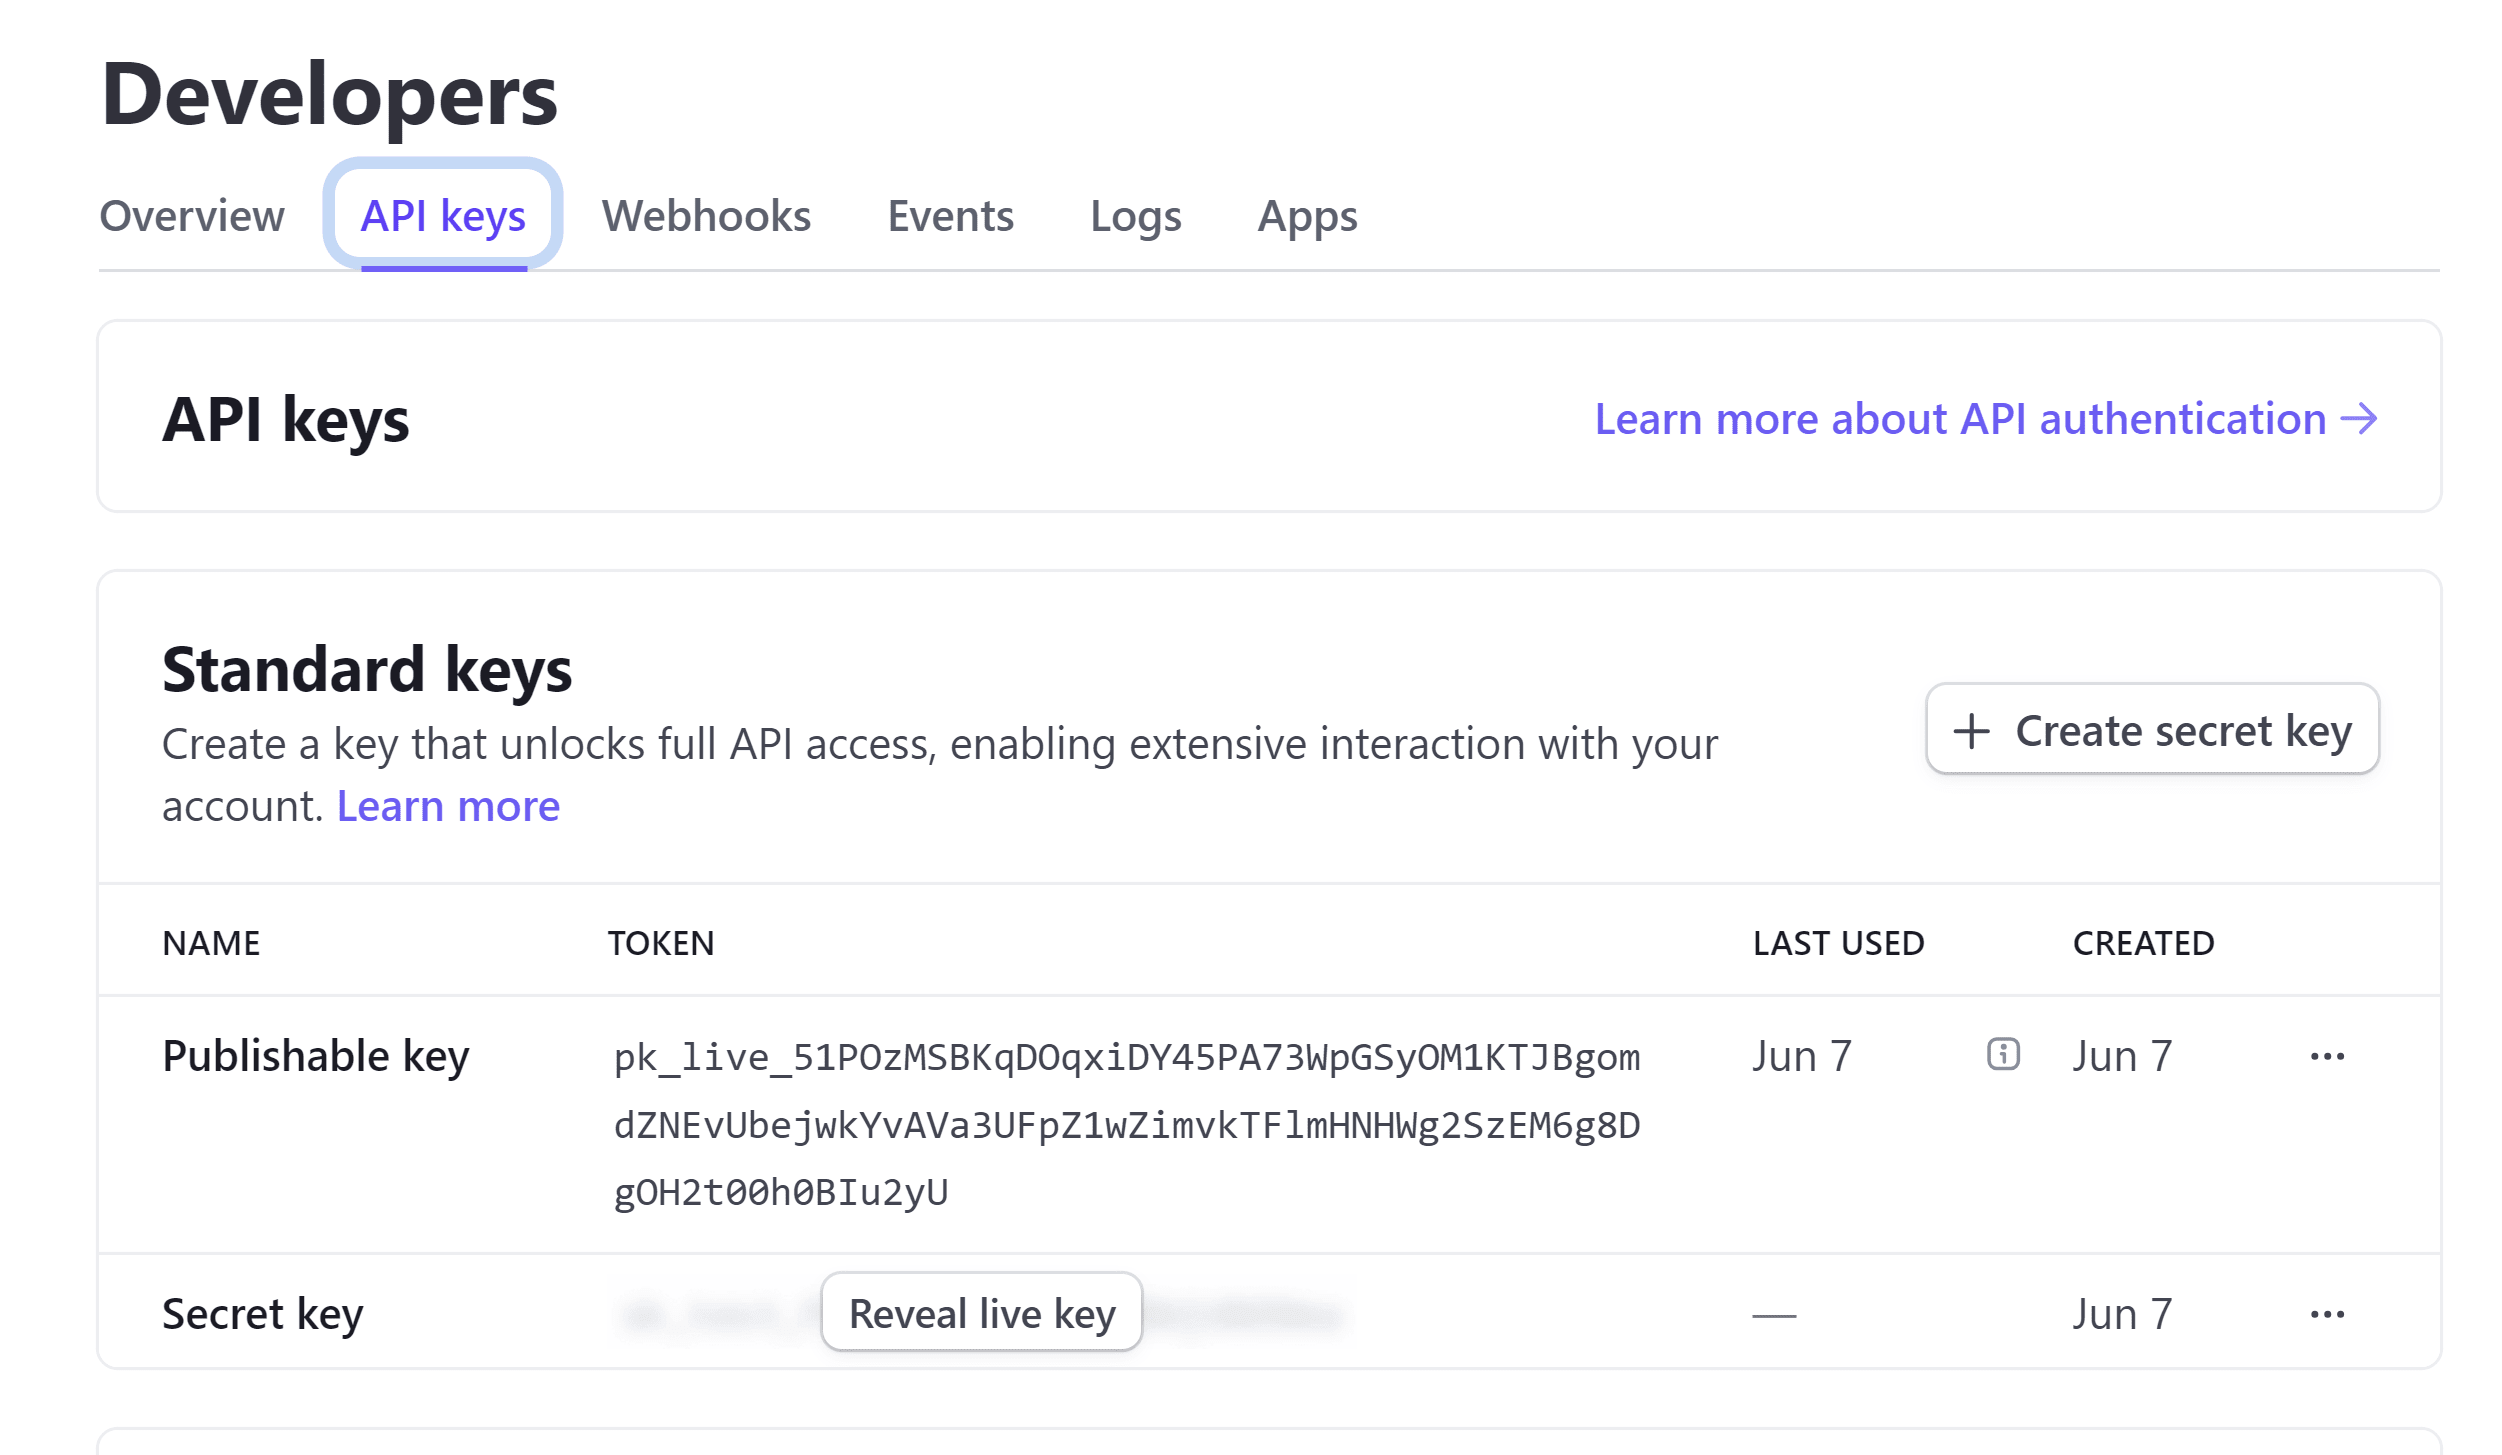
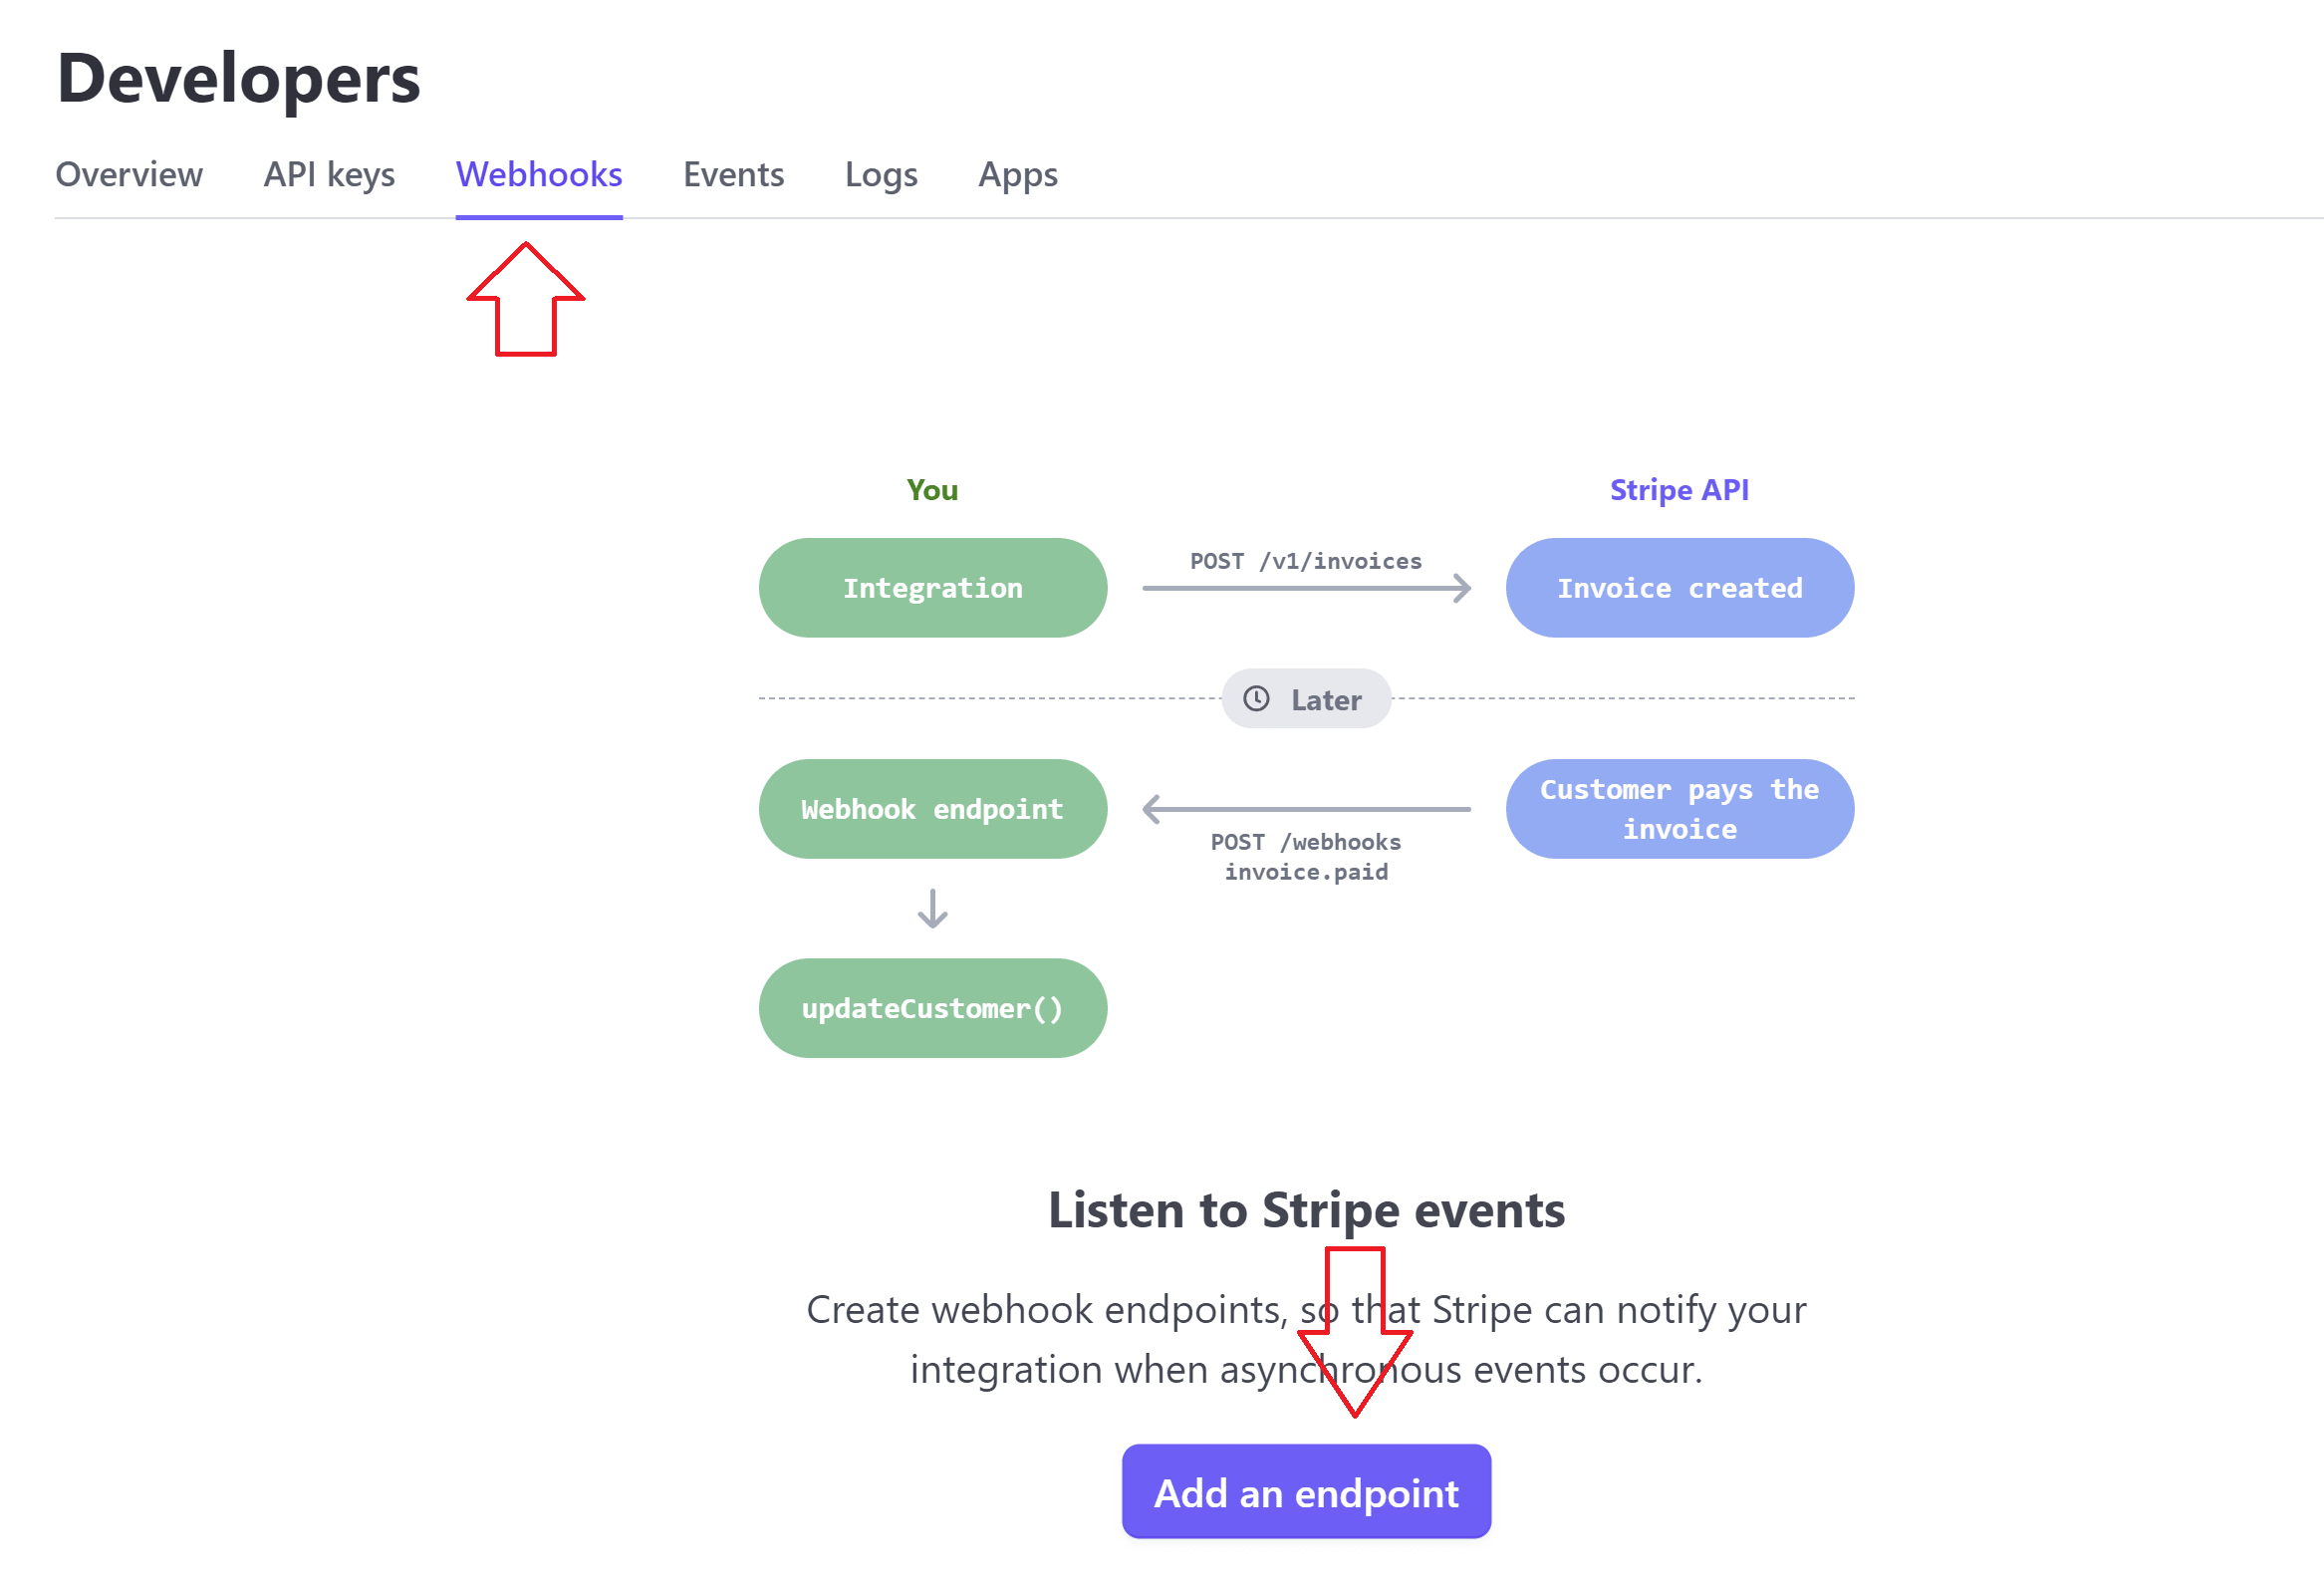
You are looking for these two keys. Keep this tab open so you have it ready for later. Then open "webhooks" in a new tab (right next to API keys) and add a new endpoint:
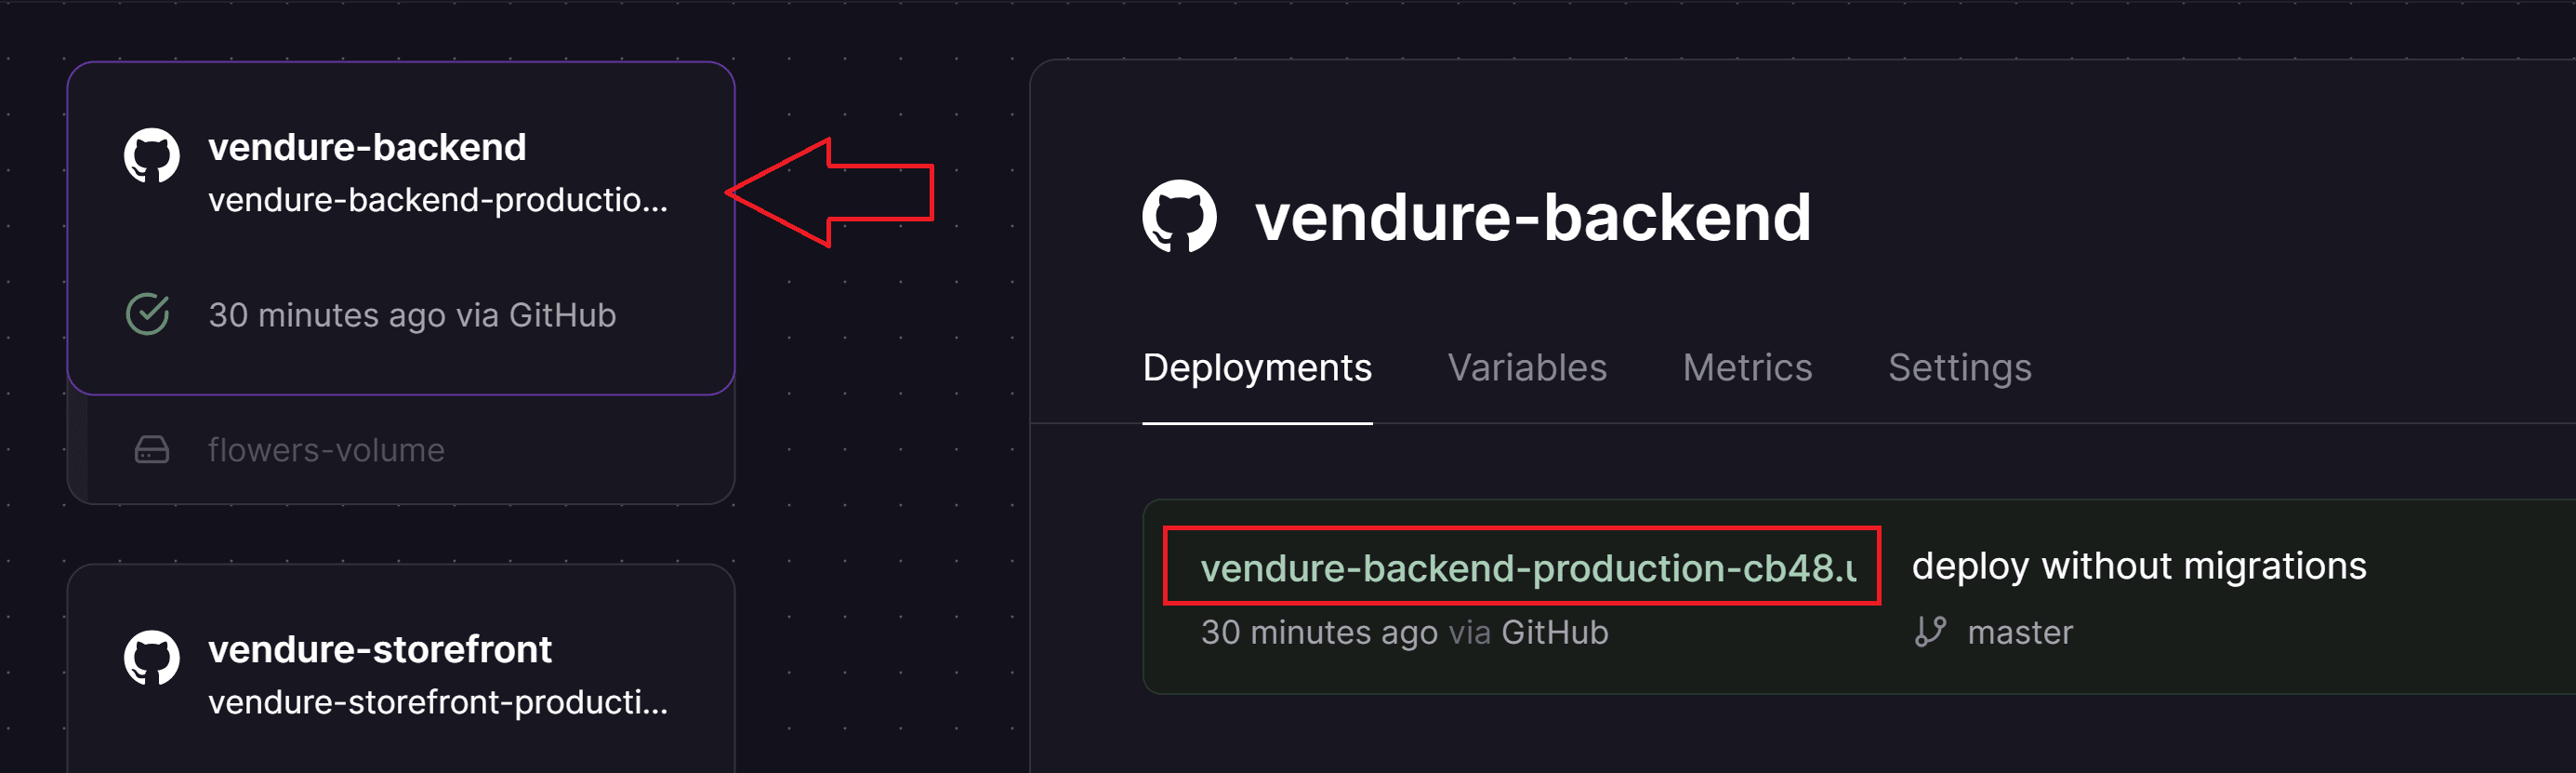
Keep this tab open as well, and open a third new browser tab. In this tab, head over to your Railway project dashboard and select your backend service. You need to copy the backend URL, just like you copied the storefront URL earlier:
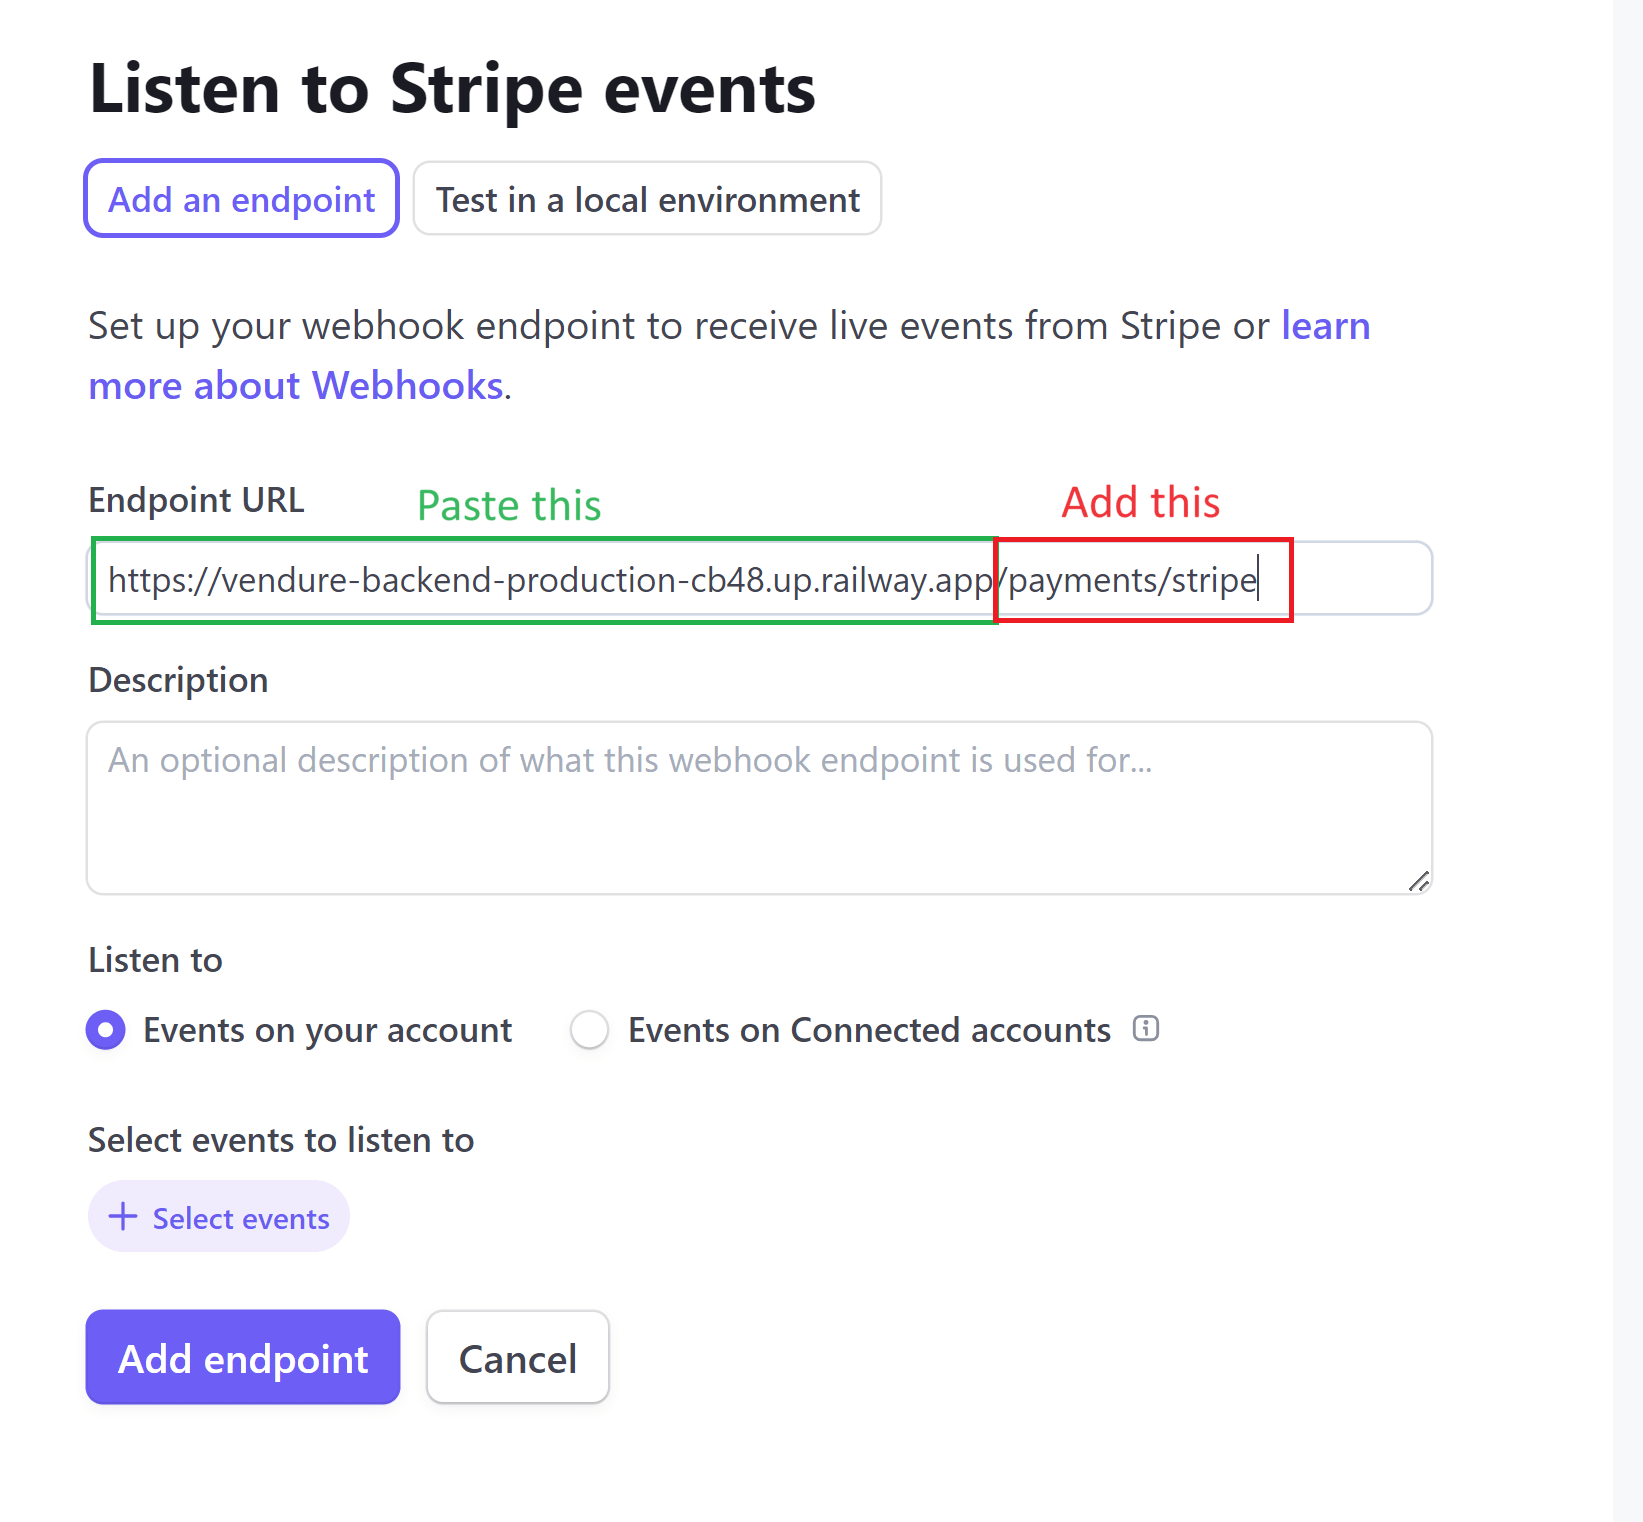
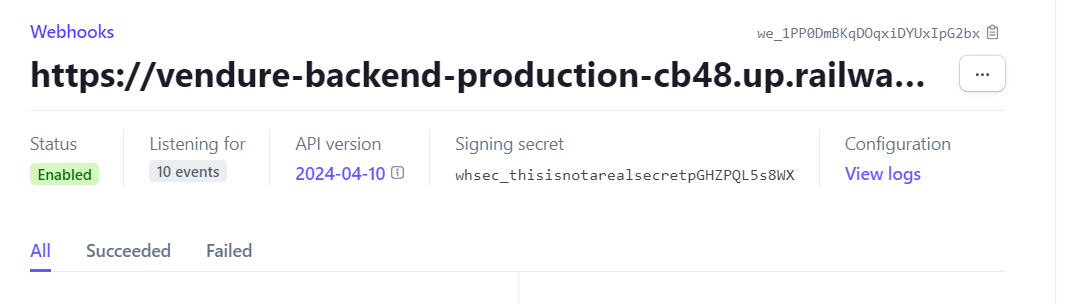
Once you have your backend public URL on the clipboard, go back to the webhooks tab and paste in the URL, then add /payments/stripe to the end of the URL in the field, and then click on the "+ select events" button.
Here is the list of events that you need to add:
payment_intent.succeededpayment_intent.payment_failedinvoice.payment_succeededinvoice.payment_failedcheckout.session.completedcustomer.subscription.createdcustomer.subscription.updatedcustomer.subscription.deletedinvoice.createdinvoice.finalized
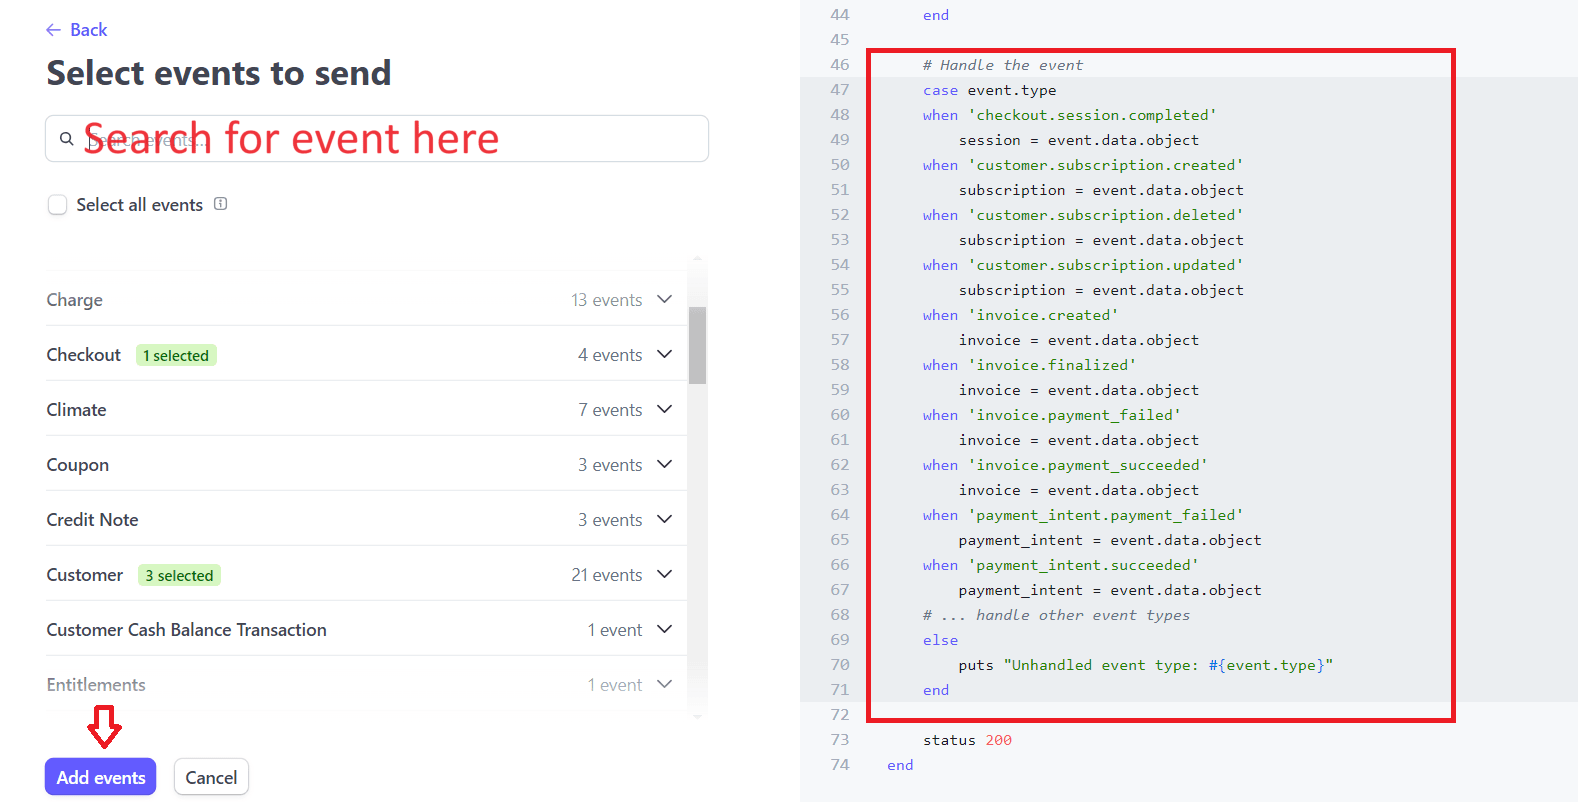
Click "Add events," then click "Add endpoint."
You should now have your webhook. Keep this tab open, as you need the signing secret close at hand.
Step 2: Setup in Vendure Admin Dashboard
Go to your admin dashboard:<backend-URL>/admin/ and expand the "settings" section in the menu, then click on "payment methods":

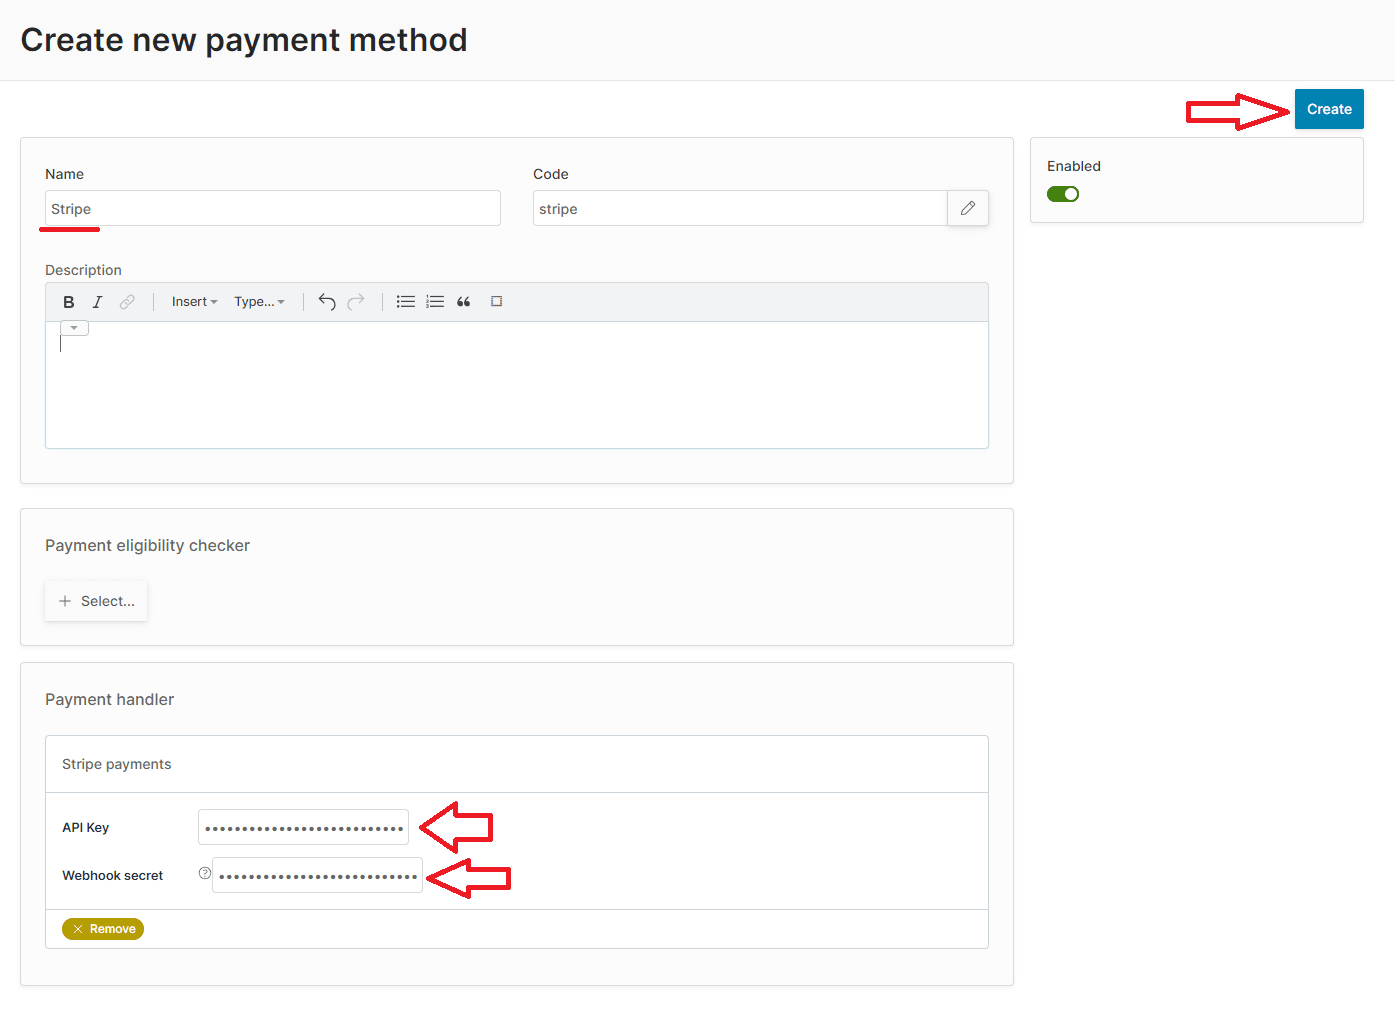
Fill in the name of the payment method. I call mine "stripe." Then expand the payment handler button at the bottom and choose "stripe payments," which is available because I installed the Stripe payment plugin when I created the Railway deploy template. If you are following this guide and trying to add Stripe to a Vendure app created in a different way, you will need to install the Stripe payment plugin yourself.
In the Stripe payment handler, you need to provide the webhook signing secret and API key from the two tabs we kept open.
Copy the API secret key into the API key field in Vendure.

And from the webhooks tab, copy the webhook signing secret into the corresponding field.
Then click "create" to finalize.
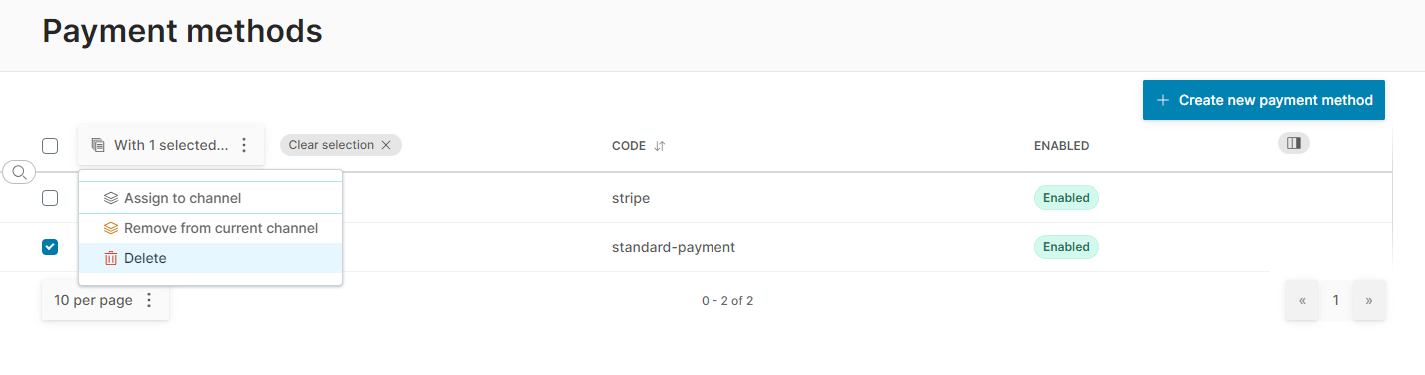
One final thing that I like to do is removing the standard payment method once Stripe has been added. This ensures that customers will check out with a real payment.
Step 3: Setup in Railway
You are almost there. We just need to provide the storefront with a publishable API key.
Open a new tab and head over to the Railway project dashboard. Select your storefront service and open the tab "environment variables." Here you want to add a new entry. The key is: STRIPE_PUBLISHABLE_KEY and the value is your publishable API key from Stripe (I hope you kept that tab open). ⬇️
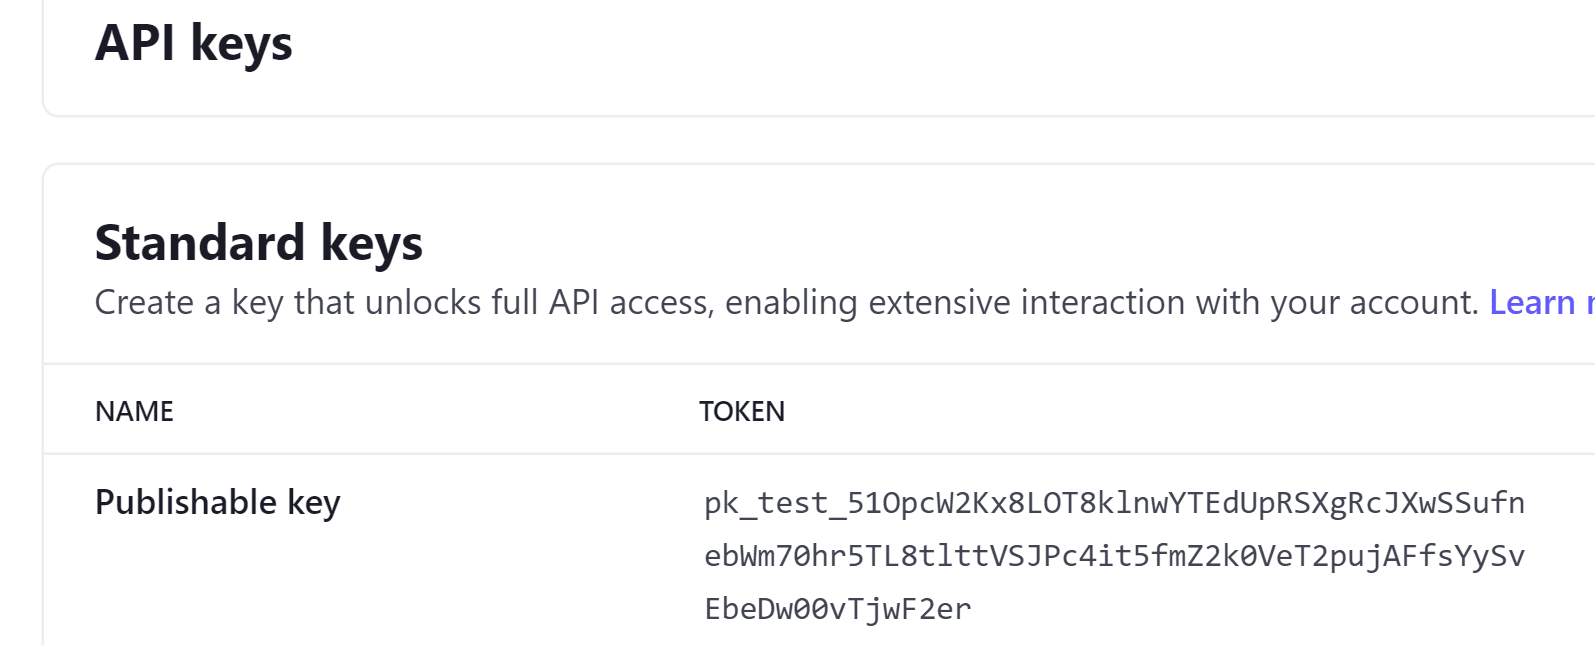
Copy this key and paste it in here:
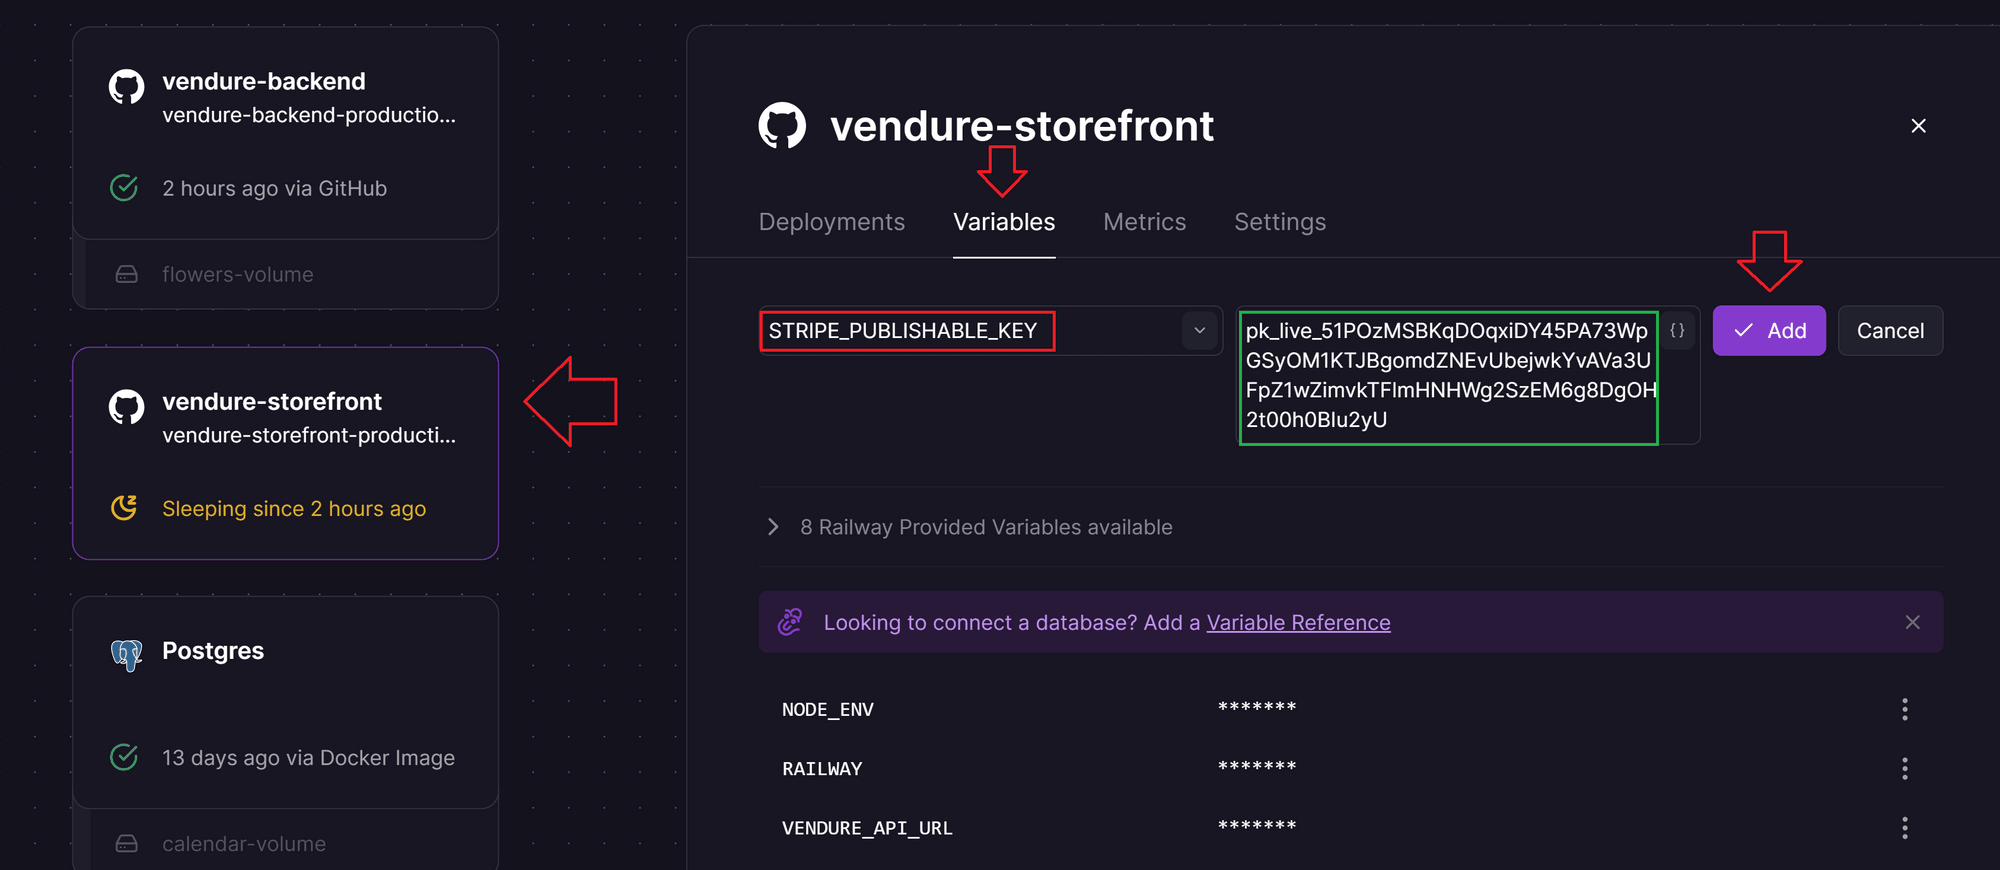
Click "add," and a change will be found, which must be deployed. Click "deploy now" and wait for the deployment to complete. Once the deployment has finished (about 2 minutes), you are done! 🎉
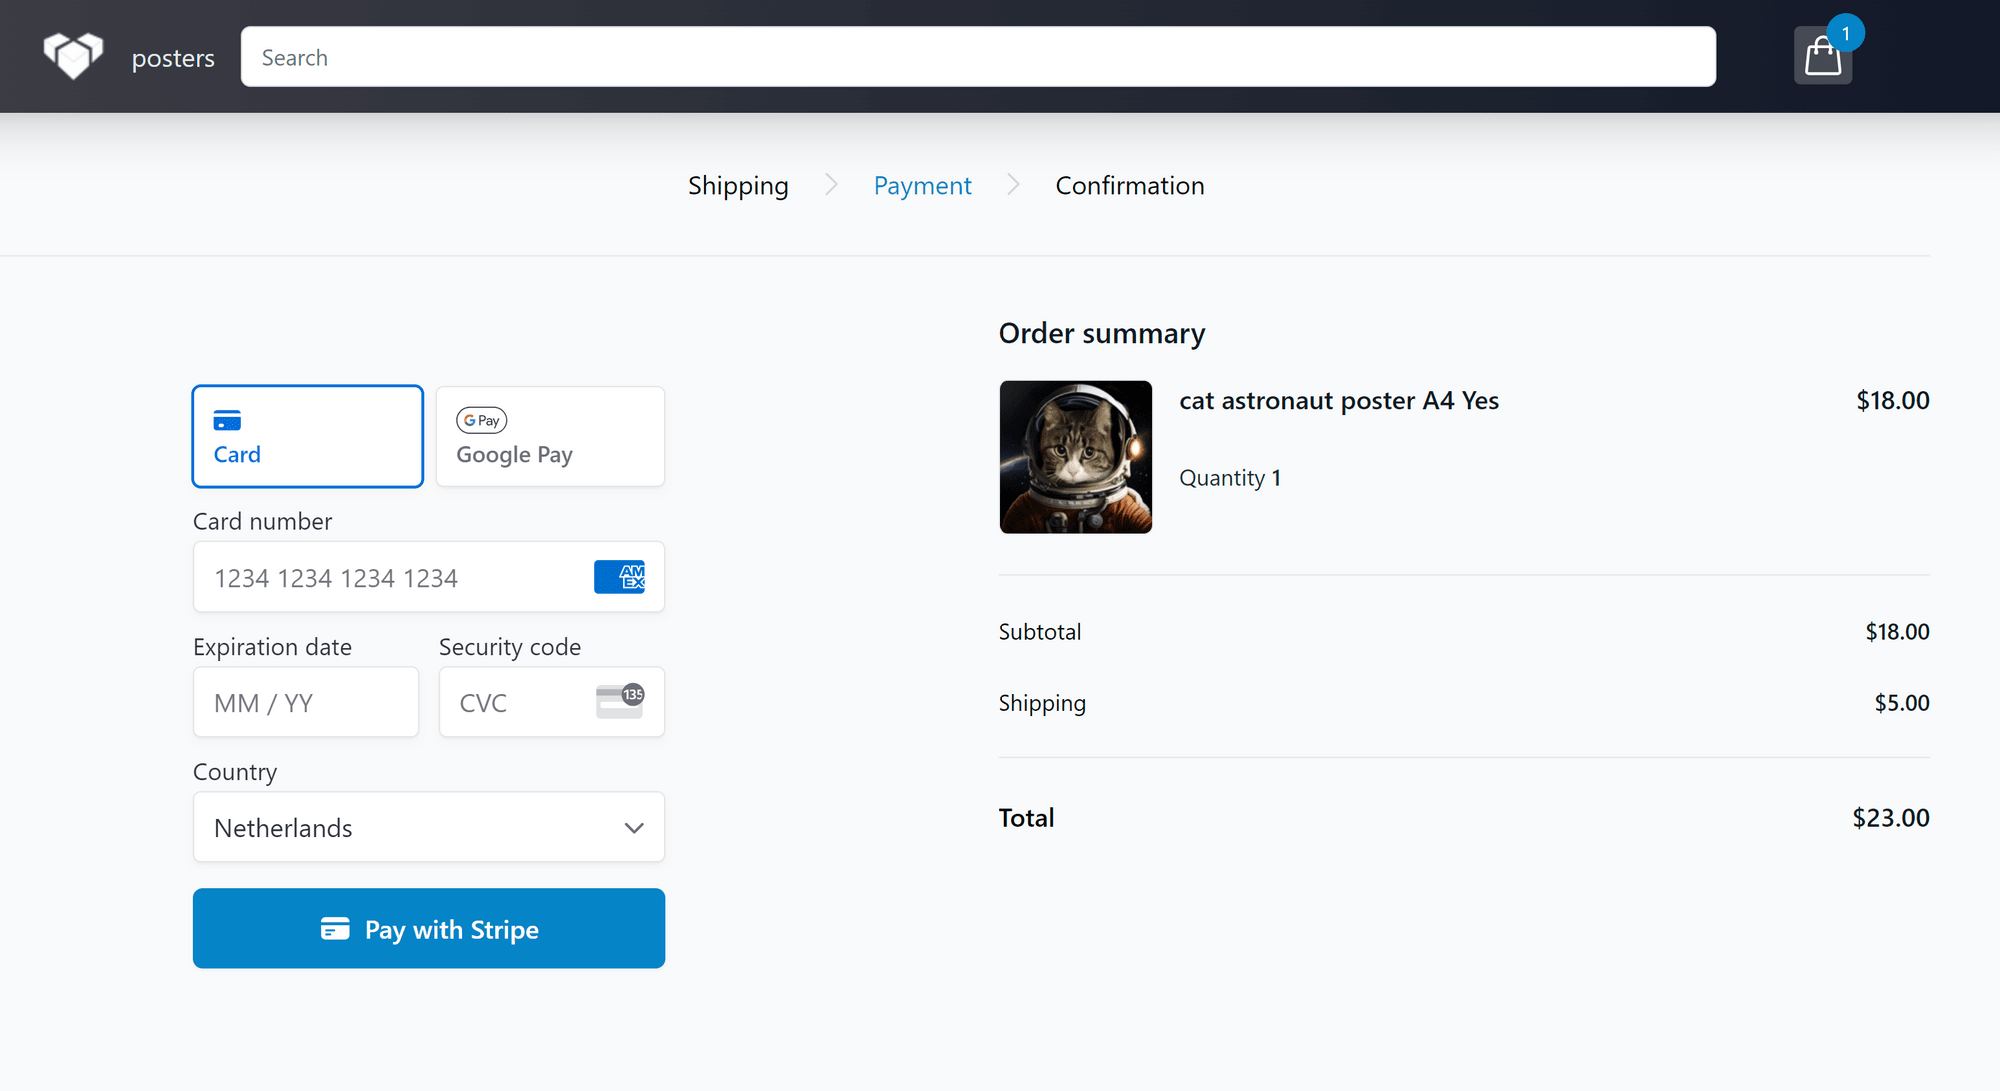
Step 4: Verify Success
Visit your webshop (storefront) and add an item to your basket. Go to the checkout page and fill in your name, address, and choose a shipping method. Then proceed to payment, where you should now see the Stripe credit card and Google Pay form.